Showing posts with label notd. Show all posts

Sunday, February 14, 2016

Jamberry From The Heart

Happy Valentine's Day everyone!
I technically already celebrated it last week as my boyfriend and I couldn't get together this weekend. However I still wanted to show you the nails I've had on all week.   I chose From The Heart as my valentine's wrap because it has the same pattern is Love Spell which was a wrap I fell in love with only to have it retire right before I made my first purchase.  this wrap is red and silver instead of purple and silver unfortunately but it is still a really cute mixed mani to celebrate the holiday of love.


As you can see this wrap comes in three different designs: red with a white heart, red with a bunch of white hearts and lines, and then a silver inverse. I've had these on for a week now and they are still going strong even thought I had some bubbles on my tips and sides, but I think that was mostly due to rushing to get them on.  I haven't had much free time lately....

Here is what I got for Valentine's Day!


The limited edition Pokemon 20th anniversary Mew plush! I was soooo happy. I also got a chocolate rose but I ate that a while ago haha.

I hope everyone has a great Valentine's Day! I'm off to meet my friend and her roommate for burritos and beer.


Saturday, January 23, 2016

Jamberry Lace Noir Over Zoya Odetta

I went to the Franklin Institute's Science After Hours Speakeasy event and wanted to do my nails in a fancy and classy way, so naturally I reached for my Lace Noir wraps!  These have a gorgeous black lace pattern that is clear so you can put it over top of any nail polish color that you wish! I chose Zoya's Odetta because its a really nice mauvey purple shade.


I really liked how my nails looked over this color, however I think the next time I use this wrap I will put an even lighter color underneath to bring out the lace pattern even more.  The nails looks really cool up close however from farther away they just looked dark.
Regardless I definitely enjoyed this manicure and am already trying to decide which color to put under this wrap next!

Thursday, January 7, 2016

Jamberry Broken Arrow

Well after Eerie Nights beginning to lift after 24 hours and Tannenbaum needing to be completely taken off after only 4 days, the satin finish was really disappointing me again and again.  I had loved the design of Broken Arrow and was really bummed to see that it was also in a satin finish, but I really wanted to wear this manicure for New Years so I gave the satin finish another go.


And I'm glad I did!  I really don't know what makes some wraps work better than others even when they have the same finish but by the time I actually am getting around to posting this, I've had these on for 7 days and they aren't showing any signs of wanting to come off any time soon. I did have some lifting at the base but not very much at all and not near enough to affect the integrity of the wrap.  The design itself is so gorgeous.  It is a matte base with random zig zags in a gradient of colors for yellow to orange to pink. These look so cool when they catch the light. Definitely a fan.
I'm glad these are working so well for me, but I am definitely hesitant about buying satin finish in the future because 1 out of 3 isn't that great.  They need to make more designs in the matte finish!

Tuesday, December 29, 2015

Jamberry Tannenbaum

I'm so sorry for the disappearance.  Finals and then the holidays really messed up by blog schedule.  However now that Christmas is over I hope to get a few done before the new year.  I already have two unboxing videos made and have some ideas for future posts, so yay!

I hope everyone had a great holiday this year.  For my Christmas manicure I bought Tannenbaum from Jamberry.  They are slightly metallic and have blurred dots in red, gray, and white.  I wanted to get these up before Christmas but it just didn't happen...so here they are a bit late.  These will be retiring after the new year so if you like how they look grab them asap! 


Honestly I don't think they l look as great as I had imagined them but they were a nice holiday specific nail for me to have on hand for the season.
I also had issues with these lifting and they are once again the satin finish.  I think I'm going to avoid purchasing any satins in the future just because I don't seem to have a lot of luck with them.


Here is a bonus picture I took of my sweet pup on Christmas morning <3

Thursday, November 26, 2015

Jamberry Faux Fox


Happy Thanksgiving everyone! I am so excited to be taking a break from school and just spending some quality time with my family, boyfriend, and dogs.  I havn't been home in over a month so I really really needed this break.  Unfortunately its right back to it come Monday.  I'll be so busy I'll barely have time to think about my birthday coming up...

Anyway for my Thanksgiving manicure I decided to use Faux Fox.  Obviously I needed these as soon as I saw them.  They are crazy cute and just eeeeehhh!!! I love them! Plus they match the new 31 wallet I recently bought.  So much win.


This design is really adorable, and I'm sad that it is only for the season.  If you like this pattern make sure to grab these foxes before January 1st!


That feeling when your nails match your bag.  <3


Friday, October 30, 2015

Jamberry Eerie Nights

Happy All Hallow's Eve everyone!
Well technically it is tomorrow but I will be busy doing my boyfriend's makeup as well as my own for a Halloween party Saturday so I won't be getting a post up that day.  Look forward to our costume looks though! I'm going to be a vampire and him Darth Maul.

Anyway what I do have for you today are my Halloween nails!  
I have been waiting to break out these babies for weeks!!

Jamberry currently has some limited edition Halloween themed wraps.  Many of them I would wear year round so I'm bummed they only last until January. Oh well.

Here is Eerie Nights.


Unfortunately the finish makes these difficult to get a good picture of but I really love the art on these wraps.  It is a nice mix of eerie and beautiful.  The graveyard scene is really lovely and quite unique in my opinion.  These are also in a new finish: satin.  So the good thing about these wraps is definitely the art work.  I got quite a few compliments on my nails from my students today.  Like how many other people are going to have a graveyard scene on their nails? Not many, so it really is a creepy and interesting design.  The bad would definitely be the satin finish.  First of all I had a lot of trouble getting these on.  They are so thin they wrinkle so much as soon as heat is applied.  I never have any bubbles on the tips of my nails but 24 hours after applying these I had one on almost every finger.  Also I would not consider these satin.  I thought satin meant a mix of matte and glossy however I feel like these are even more shiny than usual.  The extreme shine unfortunately detracts from the design.  It makes it hard to see the details of the art when most angles the wrap is just a glare.  I think it would have worked out much better to make this a mixed finish wrap with the headstones being matte and the sky being satin.  That way the black would have stood out a lot better from the yellowish blue sky.  

Besides my little quip with the finish I think these nails are really awesome and I can't wait to wear my other two Halloween wraps!

Sunday, October 25, 2015

Jamberry Flapper

These Jams have a glitter finish and I decided to purchase them because they contain two of my favorite things...black and flowers! Flapper has a gorgeous silver glitter base with a black and white flower pattern over top.


I ended up choosing these Jams to go with my Ren Faire costume because unfortunately we were rained out when I was wearing Berry Sparkler.  I think they still went well with my overall fairy/elf aesthetic.  
If you like black, silver, and glitter, these Jams are definitely for you!


Sunday, October 4, 2015

Jamberry Berry Sparkler

So I may or may not be able to go to the Ren Faire because of all this rain but if I do....these will be my fairy nails!  I ordered these on a whim with my hostess rewards and actually ended up liking them way more than I thought!


Normally I take all nail pictures in natural light but I added my flash for these because it really brought out the sparkles and made them look more true to life than regular lighting did.
Berry Sparkler is a super cute glitter finished wrap that starts pink and fades to a sparkly silver.  These are just so adorable and I've already received compliments on them.  They feel so magical, playful, and elegant all at the same time!  I'm really glad I stepped outside my comfort zone and got these wraps!

Friday, September 25, 2015

Jamberry Ditsy Floral

Well I had my Jamberry party and got TONS of Jams for only like $45 or something ridiculous like that. A few of the ones I bought were retired at the end of August.  This is one of them.  I figure I might as well still share just in case they ever come back as a TBT special.


I am honestly really glad I grabbed these before they went out because a ton of floral patterns were retired and the new ones don't really do it for me.  I like the Dusty Floral and that's honestly about it. Ditsy floral is super cute and I just love the blue, pink, and green color scheme.  It is a nice spring pattern, and I get a playful yet classy vibe from them.


I really wanted to get these on because the temperature is starting to cool down and soon wearing these bright flowery Jams isn't going to be as fitting. This is probably my last summery manicure before Fall takes over. But I am totally ok with that because I have already ordered my Halloween Jams! 

Sunday, September 13, 2015

Jamberry Black and White Quad

I needed some nice dark nails for the Epica concert I went to last Tuesday so while browsing through my Jamberry collection these stood out to me from the start.  Black and White Quad is a really simplistic but eye catching design featuring different stripes of black, white, dark, and light grey. 


I have to say....don't skip the application step of applying alcohol to your nails.  I skipped this step because I was in a hurry to get ready before the concert and they started wrinkling right away, and the next day it got even worse. Take your time!  If you skip any of the important Jamicure steps you're gonna have a bad time.  
Regardless of my little mistake I absolutely love this design and would definitely buy it again.  It is classy and simplistic and just really really nice.


Here are my nails with my entire face and outfit for the concert.  I think they went perfectly with the aesthetic I was trying to achieve.

Friday, June 12, 2015

Jamberry July Hostess Exclusives 2015

My mom hosted a party and earned so much she got 3 months worth of hostess exclusives!  Because she is the greatest mom ever she gave me half of her July sheet! I love it so much! I'm so sad it will be gone....:(


This wrap is dark blue, coral, mint, and white arranged into a cool alternating rectangle kind of pattern.  Its soft while still being intense and subtle while being eye catching.  I am really loving the flashy pattern mixed with these soft coordinating colors.


Also this is probably my best application yet! I finally have an air conditioner in my apartment so I was able to thoroughly heat and cool my wraps this time! :D

I am liking the August exclusives even more than July though so I may be hosting a party in August.  If anyone is interesting in helping me out and ordering through my party I would be so so so happy! :3

Where to buy: Jamberry Consultant
Price: $15 per sheet.

Tuesday, May 26, 2015

Jamberry Sheet Music Wraps


The wraps for this week have a special purpose!  My boyfriend's birthday is tomorrow and because he plays piano and loves music I wanted to do my nails special for his day! :)

I knew that these Sheet Music Jamberry wraps would be perfect!


I pulled out my old clarinet for this one!  I played consistently for 8 years but unfortunately stopped when I went to college. Anyway...these nails are definitely adorable. From far away they don't pop like some other designs do but when you get close enough to see the details they are just so pretty and interesting.  While they are not exactly accurate (what is up with those random ledger lines with no notes on them??) they will be perfect for any music lover!


I accidentally misaligned my thumb a bit but otherwise this application went really well.  I had some metallics on last week but didn't post them because I did a really crappy job applying them.  I just can't get them to cooperate.  I guess I'm not on that level yet.....However they still stayed on for a week and could have gone longer but I wanted to put these on in prep for my love's birthday.  If you are new to Jamberry DO NOT ORDER METALLICS. I would hate for someone to get metallics and be unable to make them look nice and write off Jamberry completely.  I have only used the regulars and they apply beautifully. I hope to pick up some glitters soon and give those a try.


I may have had a bit too much fun with these clarinet shots :P


Thursday, May 14, 2015

Jamberry Reminisce (Glossy)

So my Jamberry order came! I got Reminisce (Glossy), Celebrity Status, Marsala in Bloom, and Touch of Lace.

I decided to use Reminisce first just because its so ridiculously pretty.  Also I figure if I screw up application and they peel off in a few days I can always paint the mess up nails black.  I actually think I did these really really well.  There are like 2 wrinkles total across all 10 of my nails.  I really took my time and prepped, cut, and pressed every nail.  I'm so excited how much better I'm getting at this.


I found some cute flowers to take these pictures with.  These nails are perfect for girls like me who love summer and flowers...but also love black.  Light girly flowers just do not go with my personality so I absolutely love this dark flower print.  


There are a few more flower prints that are similar to this, Sweet Nothing and Cup of Tea.  I picked Reminisce over those because Sweet Nothing had no purple and Cup of Tea was half white which makes me sad.

My last free sample lasted 8 days until I had to peel it off.  Let's see if my meticulous application pays off with this manicure!

----------------------------

Alright so I waited to post this until a week had gone by.  I had taken a lot of care to apply these as carefully as possible and let me tell you it has payed off!!
I first buffed my nails then cleaned them with alcohol. I then made sure each Jam was cut to the right size of my nail and tried to get out all wrinkles with a cuticle pusher.  Well It has officially been one week and they are still hanging it There!


This has even been a very active week for me.  I soaked in a hot tub twice, ate crab legs using only my nails as tools, went camping, and washed my car.  All of these things usually destroy my nail polish but my Jams are still here! Out of all those things I think the hot tub affected them the most as it caused wrinkles to appear where they weren't before so keep that in mind if you wear Jams and hot tub frequently.  Overall I'm very happy and impressed.  :D

If you would like to purchase these and don't have a consultant consider Brandi.  she is young but very sweet and knowledgeable. 


Thursday, April 30, 2015

Fairy Wing Nails Using Zoya

This is another manicure that started out simple but the longer I spent studying the more I kept randomly adding to it.  It's just a coincidence that I used all Zoya polishes for this look, haha.
The gradient blue into the purple with the light sparkle at the base kind of makes me think of fairy wings :D


For the base I used Hudson which is an incredibly pretty metallic lilac.  I love this color so so so so very much for spring. I then gentle used Mosheen to create a blue sparkle gradient from the tip of my nails.  Finally I took Lux and created a light half circle at the base of my nails.  Now my nails are sparkly fairy wings.


I actually sketched out this fairy two days ago, perhaps when I color her in photoshop I'll base her wings off of this manicure!

Wednesday, April 22, 2015

Black and White Nail Art Featuring Jamberry's Smitten


So a few days ago my mom hosted an online Jamberry party and the hostess sent out free samples to anyone who asked.  Smitten was the sample I received so I used it to create this black and white mixed mani! I ended up buying four wraps during the online party so prepare for me to be reviewing and posting those! I'm all about this new nail wrap trend. 


The sample of Smitten I got was actually the smallest size meant for the pinky but because I have very thin nails I was able to wear it on my pointer finger.  Luckily the jams are easy to cut so its no problem trimming them down a bit to get the perfect fit on my nail. For this look I first painted all my nails with Flormar's matte nail enamel in M02 Satin Black which I picked up in Turkey.  Obviously I put top coat over it so the matte effect is lost but its my only black nail polish at the moment....I then stuck on my nail wrap.  Application went much better this time since I used the baggie method and an eraser to help apply pressure.  Finally I took my white nail art pen from Sephora's nail kit and drew on the designs.  


I'm all about this manicure and I would definitely do this again.  I can see myself using Jamberry as accents and doing my own nail art to create a mixed mani fairly often.

Thursday, April 16, 2015

My First Jamberry Attempt with Silver Floral

My mom has been using these Jamberry nail wraps for a few months now.  She does all her fingers in about 10 minutes and they look perfect.  I've watched her do it a few times and it didn't look so hard.  I knew my first attempt would be less than wonderful so I thought I'd document it for you all to see.  Be warned this is my no means an indicator of how Jamberry will work for you.  Like I said my mom is a master, I believe it probably just takes some practice to get right.


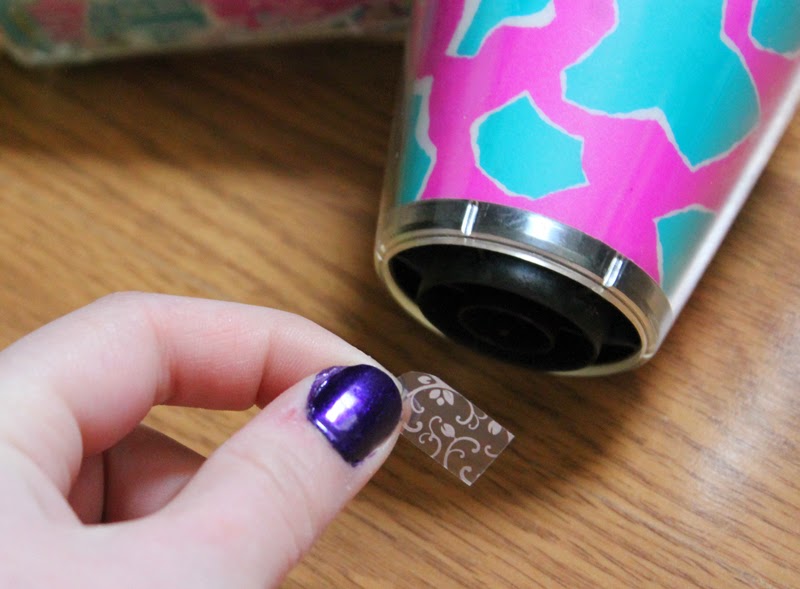
I'll be using the clear nail wraps in Silver Floral. My mom gave me the 4 biggest sizes which you can cut down to fit any of your nails. 


I took the biggest one, cut it in half, and then cut it in half again to get two small bits.  Make sure you line it up with your nails first to make sure it will still be big enough after cutting.  I then trimmed the bottoms to round them off so they would sit on my nail bed correctly.


So first you peel off the wraps and hold them in front of a heat source for a few seconds until they become pliable.  I used a mini hair dryer that I sat on the floor.


After getting it soft I stuck it on my nail and flatted it out as best as I could.  Obviously I had a heck of a lot of bubbles and bumps since there's no way to get a feel for how to apply these best on your first attempt. After flattening it down you are supposed to hold it in heat for another few seconds so the wrap binds to your nail.


This next part is where I ran into my first real issue.  You are supposed to file away the excess, which has worked fine for me with other stick on nail wraps but for whatever reason I could not break through these no matter how much I filed.  I'm not sure why because I've watched my mom file them off in seconds...maybe my file is just that crappy.  I had to instead take some nail clipper and clip my nails every so slightly to get it even with my nail.


Overall this looks pretty neat and even though mine are filled with air bubbles I'm hoping I can get better at it with some practice.  The nail polish is Zoya's Belinda.


This is an example from the Jamberry website of what you get for $15. f you are smart about how you use these one $15 pack can produce a lot of uses. If your nails are not long you can cut all of these in half and instantly double the amount like I did.
They are supposed to last 2 weeks on your finger nails and 3 weeks on your toenails.  That's pretty good considering my nail polish starts to chip after only 2 days.

Also I wanted to note that this specific type of nail wrap is metallic and the metallics are the hardest to use.  Of course I would start with the most difficult.....so if you want to purchase from Jamberry consider starting with a non metallic until you get the hang of application.

My mom is having an online Facebook party so I may be getting more of these to show you! In the meantime I'm going to keep practicing.

Price: $15


Friday, April 3, 2015

Cartoon Nails

So I hadn't even really expected to do this.  I had painted my nails with the Lancome polish my  boyfriends mom gave me and then a day later got really bored and randomly started outlining my nails in black.  I then realized that I was only a few dots of white away from making them look straight from a comic book. 


I began by painting my nails with Lancome's 147M Rouge Valentine.  I then outlined them with a black Sephora nail art pen.  Finally I added the white highlights with the white version of said pen. They are both from Sephora's nail art kit which I really like so far.


I think these have the neatest effect from farther away. This is a cute idea but I fear the concept is lost on and not noticed by a lot of people.  Not sure if I'd bother doing this again.

Wednesday, March 4, 2015

Matte Black Nail with White Dot Design

I received a Sephora nail art kit for Christmas and have been trying to experiment with all the different tools. Today I decided to use the white polish that comes with a pen fixture, perfect for drawing or dotting!


To get this look I applied Zoya's Noot (I use this so much I might actually run out!) and then put a matte top coat over it.  I use Sally Hansen's Big Matte top coat. I then took the little Sephora dotting pen and dotted away! It was so easy and the result is so cute! I love the minimalism. 
I can't believe those weird bulgy dot things on my nails! Even when I examine my nails close up I can barely make out the raised bumps....my camera plus the lighting must have seriously brought them out. So sorry for their unsightliness.  My nails look flawless in real life I promsie! Haha.

Sunday, December 14, 2014

Formula X Nail Polish in Voodoo

While black Friday shopping I picked up one of the $10 black Friday deals at Sephora.  I got the Formula X nail polish duo in Voodoo and Juju.  I plan on giving Juju as a Christmas present so I only have Voodoo to show you today, sorry!
I've been wanting to try Formula X for a while after hearing such great things about its staying power and well...after giving it a try I currently have a love hate relationship with this polish.


Pros:  It is an absolutely gorgeous color.  The pink is so soft and dainty while also having an interesting sheen to it.  Its just so neat! It is also insanely opaque.  I could have only applied one coat to get a full layer of color but out of habit I applied two anyway.  Because of this I could see this being a great polish to do designs with over dark nail colors.  I'm already planning a black nail with pink polka dots look!
Cons:  This has no staying power.  My Zoya polishes usually chip after 3 or 4 days even after doing dishes.  This started to chip after 24 hours. WHAT. I thought oh maybe it's just a fluke and patched up the tips, well every day I've worn it more and more and more chips formed.  I am pretty bummed  that a nail polish at Sephora has the staying power of a drug store polish.


To stop the annoying chipping I patched up the damage as well as I could and added a coat of Zoya's Pixiedust polish in Lux to the tips, creating a super cute sparkly pink manicure.  My nails make me feel like a princess <3

So my final verdict....maybe other Formula X  shades are better but this one is best used for nail designs rather than a simple all over color because of its great coverage but lack luster staying power.
I don't think I'd buy another one of these at full price unless I was sure the staying power would be improved, but at $5 I'm not mad about this purchase

Where to buy: Sephora, formulax.com
Price:$12.50

Saturday, October 18, 2014

Monochromatic Sparkly Nail Design

Because I'm obsessed with OPI's My Voice is a Little Norse I did yet another overly sparkly nail look! And I know I will be using it again next weekend for a manicure I'm doing for a special dance. I love this color <3


To do this look I painted my nails with Zoya's Noot, a very dark grey. Then I carefully took Norse and made a half moon at the base of my nail and then a curved tip at the top of my nail to have a slightly curved strip of Noot showing through.  This mani was super cute and easy and I could definitely see doing it again with different base colors.